Earlier YouTube is used to be a premium platform and it was very difficult to become a YouTubers but in recent years with easy accessibility of the internet many newcomers emerge as big YouTubers and influencers and many are entering because YouTube not only gives a decent amount for your views but also good fan following and popularity.
If you are also planning to get into the YouTube world or you are already a part but now your YouTube videos are started gaining popularity, and you want to set up a very cool room or studio to shoot your videos, but you’re facing a problem, lack of money.
Is lack of money holding you back? Do you desperately need a YouTube studio? If you answered both the questions with a big YES, then are you sure that you require a huge amount to get started?
Our team is always here to help you so that these small things won’t come your way to achieve your dreams. So let’s find out with what things you can set up a YouTube studio for little money.
Do You Need a YouTube Studio?
Before moving on, though, it is time to take a hard, good look at the scenario. Do you need a YouTube studio?
We have already considered the fact that lack of money might collapse this plan. But there is another thing that scuppers this plan at that is SPACE! To build a YouTube studio, you need a good space to put all the items. Without an extra room or space elsewhere, there is no sense in buying types of equipment for your studio.
Although, if your YouTube channel is about posting or streaming video games or focused on a slideshow with normal voiceovers then congratulations your YouTube studio already exists in form of video editing software or app on your PC, tablet, or smartphone.
If you are sure that you need a studio, then give it a try and take time to think more about it from all dimensions. Like if your videos fall in the category of vlogging (one of the most popular types in YouTube videos) then it is fine you do not have a studio. Also, if you are planning to record think would it be easier to film in a studio or any room in your house is fine?
The category and types of videos you are creating will also impact and changes the location of the YouTube studio. For example, are you creating cookery, DIY, lab-based experiment videos? All these categories of video require some particular location, such as a kitchen, garage, workshops, or laboratories. So think, is it possible to convert these places into a studio?
Practically, the answer is “No” probably. Therefore, if you need a YouTube studio and planning to build one you will need to consider types of equipment that are easy to set up, portable, and easy to store.
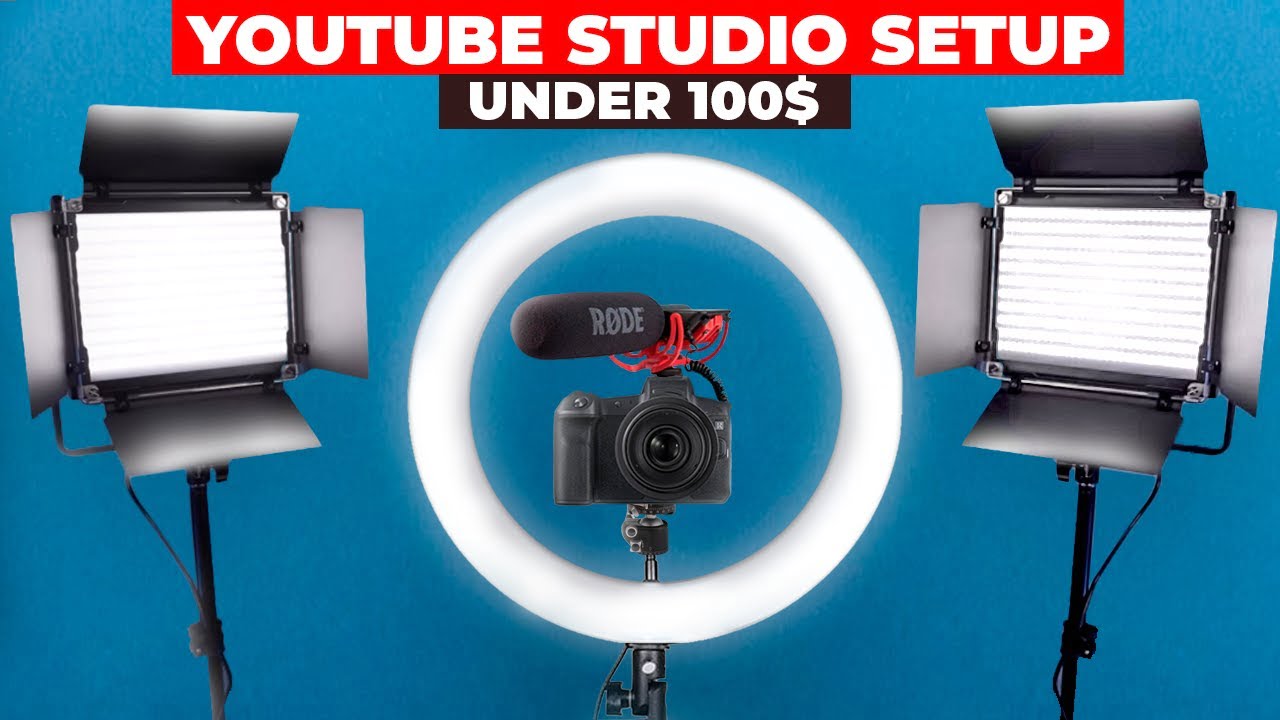
Process For Building Cheap Youtube Setup
If you’re planning to start your YouTube channel then it natural that you must think about the complexity involved, the hardware and equipment required, and the cost. Recently our team also taken a challenge to start a YouTube channel and now setting a room as a YouTube studio, so why not also come on a journey with us to set up a studio and learn from our mistakes? So, that you will not make any of these mistakes.
Honestly, we wanted to build a YouTube studio in the possible lowest amount but right now we also did not have a particular budget in our head. We are focused to put together a setup that would help us and results in the quality of content because we are surely not spending much but we want every single rupee worth.
1. Choose Your Camera
The first and most important thing on the list for building a YouTube studio is a camera. For the camera, you have three options and you can use and also recommend using two at the same time for better video shots.
In today’s world, everyone has a smartphone and if your smartphone has a decent resolution then you can use it and this is your option number one. Just launch the camera app and start your recording session. Undoubtedly, every smartphone released after 2015 is suitable. Nowadays camera quality and megapixels are key focused points for most smartphone companies, so it is obvious that clarity and quality are given.

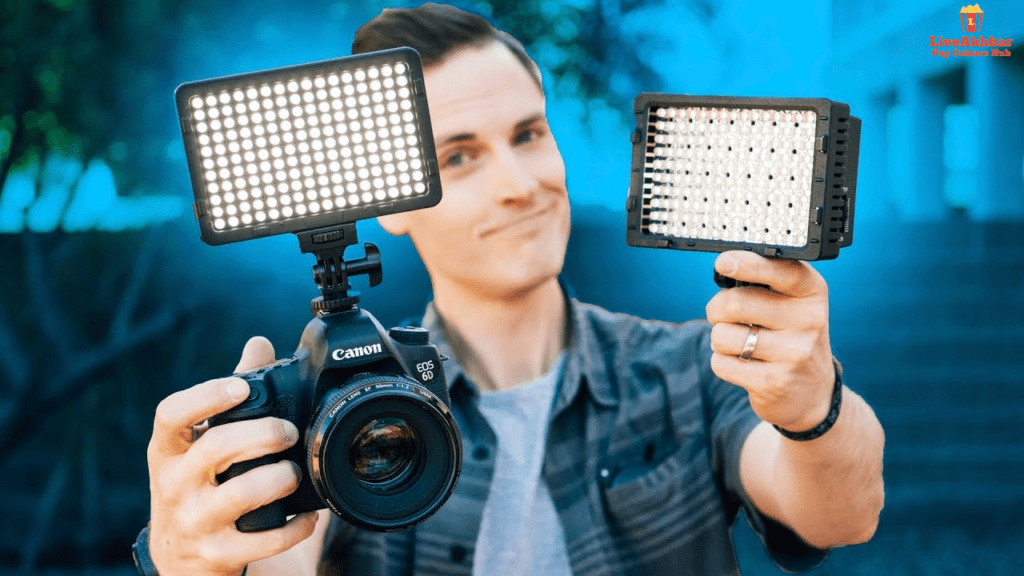
Second, if you have a DSLR then you can use it on DSLR video mode. In DSLR there is an option to switch lenses and no doubt delivers better video quality as compared to a smartphone, however, the difference is not so broad.
Now earlier when we tell you that it is recommended to use two cameras at a time what we mean? You are familiar with those videos where a person sitting in his room keeps blabbering with a static camera position. And as per our opinion, those static and single shots of someone speaking are a little distracting and boring too. Keep one camera in front and another one positioned to the side or above like a CCTV camera for the “B-Roll”. By this, you will pretty cool shots when you start editing and your videos become more effective.
Lastly, if you are a video game streamer and planning to do live stream frequently then a webcam is all you need. Rather than a built-in webcam, use an external device, because it is easier to position it for different shots.
Choose the Right Camera
As far now we already discussed much the cameras but still, a lot is remaining. Cameras are quite expensive and a big barrier to enter YouTube for recording videos. Below there are some good options for selecting a camera.
Free Option
- The latest smartphones are nothing less than professional. Anything after the iPhone 6 and similar from Samsung will be more than required to use for recording video.
- A smartphone does not only fit into your pocket but is a portable option for on-the-go shooting. Just get a tripod or any elevated surface to place and start shooting.
Here are some tips to give an extra edge to your mobile videography:
- While recording, if you look at yourself then your eyes are not in the center dedicated to audiences. So always stare at the camera lens.
- Always hold your camera in landscape orientation not in portrait orientation as it covers more of your background.
- Place your camera slightly higher than your eye level and not too high.
Small Budget Option
If you not feel comfortable with your smartphone and finally decided to buy a camera that fits into your budget then the Logitech C920 Webcam that comes for $99 is a good option. You can record video in HD using this and can connect it to your PC or laptop using a USB cable. It also has a screw to fit it into a tripod stand. One drawback with Logitech Webcam is that it only works when connected with a PC. Yes, you can also connect it with your laptop and take it where you want but still, it is not that convenient.

Bigger Budget Option
If you want to take your YouTube career to next level and desperately want the ultimate camera to get things done, then look at digital SLR like Nikon D3300 that comes for $499 or the Canon Rebel T5 that comes for $399. So many vloggers use these cameras.
2. Tripod
Decided to use a smartphone? Then you need a tripod to place your smartphone and vivid tripods are available online for phones. Also, few DSLR tripods come with smartphone adaptors offering multi-purpose use. Tit for tat, there are plenty of DIY videos available on YouTube to make a tripod stand at home without spending a single rupee. Somewhere between $25-$55, there are ideal, sturdy, and good tripods available for daily use on Amazon. For a secondary camera, “mount anywhere” will help with their bendy legs, enabling you to attach your smartphone to walls, pipes, doors or anywhere.

Get a Tripod to Stabilize Your Camera
Tripod will not only provide you good base and platform to keep your mobile or camera but also provide extra stability to your videos. There are a variety of tripods available and it depends on you and your needs.
Free Option
- Do not worry if you don’t have money for a tripod. Just find a shelf to place your camera or a stack of books that might work for you.
- If you’re using a webcam, then it will fit perfectly on top of your device’s monitor. Moreover, there are plenty of DIY videos available on YouTube to make a tripod stand at home without spending a single rupee.
Small Budget Option
Somewhere between $25-$55, there are ideal, sturdy, and good tripods available for daily use on Amazon. The Jony GorillaPods are flexible and cool tripods if you have a small share of the total budget. These tripods start from $10 and up. As you move upward with price, the expensive version supports more weight and suitable for DSLRs.

KCOOL Octopus Style Adjustable and Portable Stand Holder that comes for $12 is another good budget option and has a remote and universal clip.
Bigger Budget Option
- If you want a tripod that stands as tall as you, the InnerTeck 70-inch camera tripod/monopod with carrying bag ($45) is worth considering.
- If you want a tripod that stands as high as your dreams (kidding), the InnerTeck 70-inch monopod or tripod that comes for $45 is worth considering. And if you are not sure about it then just go on any e-commerce website and search “tripod”.
Must Read || How Can I Turn My Room Into A Movie Theatre?
3. Lighting Your YouTube Video
If your video is perfectly lit it will look good and make a great impact on your audiences. However, there is no need to add more light unnecessarily. Open, naturally bright spaces will do your job perfectly. Record a test video and then decide whether you need more lighting.
If you conclude that it is darker and needs some light, it time to find a solution.
Potentially lighting equipment is the most expensive item on your YouTube studio items list. Photography Softboxes withstands come in the range of $40-$100 per piece.
By fitting daylight bulbs in the ceiling you can you can save money, although this not that effective. A better option is a ring light that most of the YouTubers and TikTokers use as they give an instant boost to your videos.
Good lighting is very important just slight darkness in your videos can turn your looks into unprofessional and creepy. Thus, a good and bright video is always liked by everyone. Below there are lighting options to consider.
Free Option
- The ultimate source of energy and light, the SUN! Yes, natural light is the best form of light always. Therefore always try to record in an open location or where plenty of sunlight is available.
- Also, you can use a lamp or desk light to add extra light where necessary. Also, keep in mind that light is not fluorescent, it will deliver a yellowish unnatural effect thus adjust things accordingly.
Bonus Tip: Always try to keep your face towards the light source as much as possible, so that your whole face get detailed in light. If the light source is at the back of you them if gives a silhouette effect.
Small Budget Option
If you have a budget to spend on light sources, then Limo Studio Photography White Photo Umbrella Light Lighting Kit comes for $29 and it is a great deal as it will take away all the darkness.
Bigger Budget Option
Ring lights make anyone look good. If you have a good budget and want to spend a large portion of it. Diva Ring Light Nova 18 inch Original Photo/Video Fluorescent for $199 and another 6 inches Stand for $39.
4. Set Up a Professional-looking Background
Many of you have wrong aspirations when it comes to background. You need not a big, fancy or ornate background as you are not building a TV news studio.
Always, anything behind you needs to be decent and tidy, and not too funky a d distracting. Because in a video the important thing is you and your appearance, not your background. If your house has a modern interior design then this can work well as a background. But if you do not have then you have to do something. Two options for which you can go are-
- First,a green screen or wall with different relevant or cool posters. Install a green screen in the background and drop a suitable image on it while editing or streaming.
- Second, a stunning background. There are plenty of background kits are available with which you can decorate your background.
Free Option
- The lowest and cheapest background that you can simply use is what you have in your house. If you have a bookcase, good sets of curtains, a showcase or even a nicely painted wall can work for you. That’s it, not a single rupee to invest and get a simple decent background.
Small Budget Option
If the above tips are not satisfying you and you want to get a dedicated background for your YouTube studio then you can look toward a 6-1/2′ x 10′ Slow Dolphin Fabric Video Studio Backdrop Kit that costs $58.
Bigger Budget Option
If you are all set to spend a handful amount then you go for a double-sized pop-up banner with some branding on it as per your choice. The price of these banners varies depending on the finish, quality and size. You can get one between $100-$300.
5. Add a Microphone to Your YouTube Setup
The more expensive is your mic the better quality you will get. However there are some cheaper options are also available on an e-commerce website, in form of an external compact mic that you can attach anywhere in your studio. Besides, there is are some free options too, but we will suggest that if you have a budget then spend it on getting a good mic because audio and video quality is the only thing that matters most. And the poor audio quality is never liked and unforgiving.
Free Option
- If you are using your smartphone for recording purposes then the smartphone’s microphone should provide you with a decent quality if you record video in a quiet place with no noise of wind in the background.
- Additionally, all the desktops and laptops also have a built-in microphone so you can use them too.
Start YouTubing Before You Build a Studio
- At this stage of our discussion, you have to understand that YouTube studio is not a compulsory thing. On YouTube, there are so many big YouTubers without a studio. After all, with just only Internet and your smartphone, you can upload your videos to YouTube easily.
- For sure you will need a YouTube studio one day, but don’t let these unnecessary things stop you. Focus more on your content than showing off and start today. First, let YouTube giving you money for your content and then invest in these things. Because all the big YouTube stars you saw today just started with a normal smartphone and keeps improving their content and at end of you also know what they achieved.
Must Read|| Best Podcast Apps That You Must Try!
Well explained.