Virtualization on Windows 10 is one of the most powerful features baked into Windows 10. Windows 10 is the latest release of the Windows operating system after Windows 8.1. It is released nearly two hours ago. So, here we provided the information regarding the virtualization of windows 10. Virtualization is the native backing for hardware virtualization. This native support would be provided by the virtualization program called Hyper-V. Once you allowed virtualization on Windows 10, it helps to develop a virtual machine on your system. This virtual machine would be completely independent of your main computer system. If you want to install anything, you can do it without bothering about your main system. It will never be messed up with the main system. Here, you find the whole process or steps to allow virtualization on Windows 10.
A virtual machine is a software of a computer system. They are assembled within a physical computer. It allows you to create many different computers that can run various operating systems and programs. The virtual machines are regulated by using special software called Hypervisor. These virtual machines can not run on all computers, due to the advanced nature of virtualization. Earlier, you could find this feature in servers only. But with Windows 10, users can generate their own virtual machines.
Pre-requirements for Hardware Virtualization
These requirements are essential for running and developing virtual machines in Windows 10. The important and essential requirements, which are needed before virtualization are as follows: Windows 10 Pro or Windows Enterprise. The Hypervisor is not available for Windows 10 Home Edition. A 64-bit processor with SLAT (Second Level Address Translation). System must have a RAM of 4GB at a minimum. BIOS- level hardware virtualization support. BIOS is a small program that deals with the boot-up of the computer, it enables that everything is in the right place.
How You Will Know What Windows Version Do You Have?
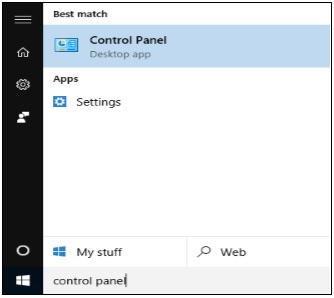
To find out what windows version you have, you have to follow these steps:
Step 1. Search Control Panel in the Search Bar, and then open it.
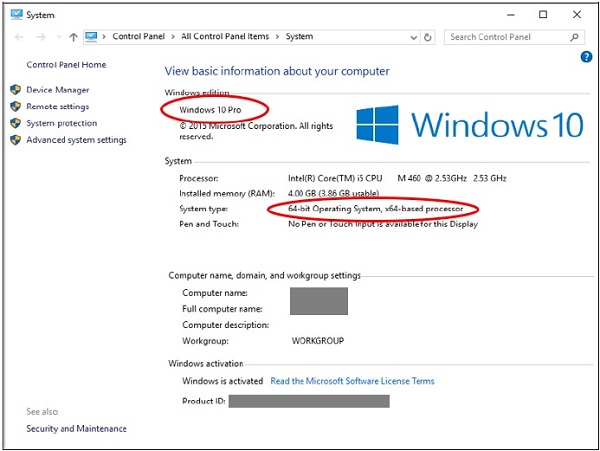
Step 2. After the opening of the Control Panel, click on the System option.
Step 3. In the System window, it appears what Windows version and processor your computer has.
Steps for Allowing Virtualization in the BIOS
We know that the BIOS is a small program that operates whenever you turned on your system. It is developed within a system to help the computer boot up by making sure that everything is going properly in the system. BIOS also regulates some advanced features within the computer.
Follow these steps, which are given below to enable virtualization:
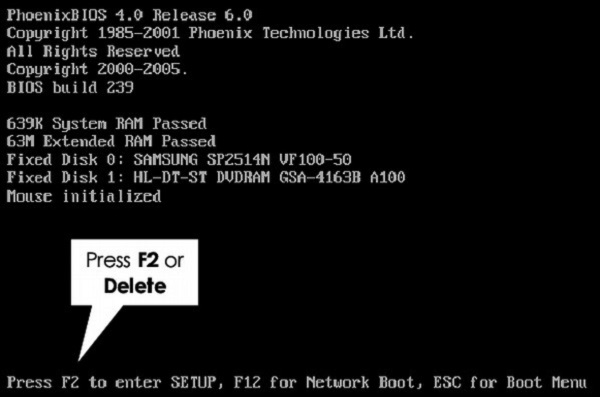
Step 1. First, restart your computer and enter the setup for BIOS. This setup is done by pressing F2, F10, or Delete key just as the system turns on. These keys vary from system to system. On some PCs, it’s the ESC key also.
Step 2. After step 1, you must have to enable all the settings of virtualization. The BIOS setup also varies from system to system, greatly, it totally depends upon the brand of the computer.
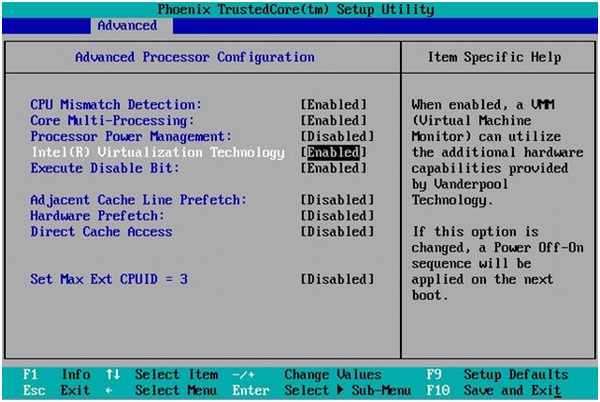
Step 3. After allowing all the important settings, save and exit the BIOS setup by pressing the F10 key. After this, the system will automatically restart.
READ MORE: 15 Best apps to watch Anime free dubbed | How to watch anime for free
Steps for Setting Up of Hypervisor
You now need to set up Microsoft Hyper-V, to develop and organize virtual machines. To do that, follow the given steps:
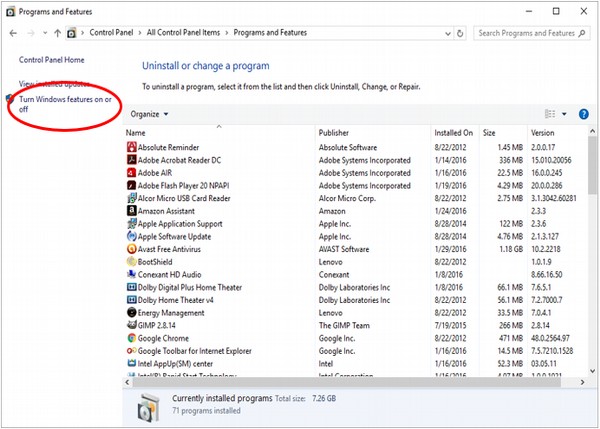
Step 1. Open the Control Panel by searching in the Search Bar.

Step 2. After the opening of the Control Panel, click the Programs and Features option.
Step 3. In the Programs and Features option, the user will find “Turn Windows features on or off”, click on it.
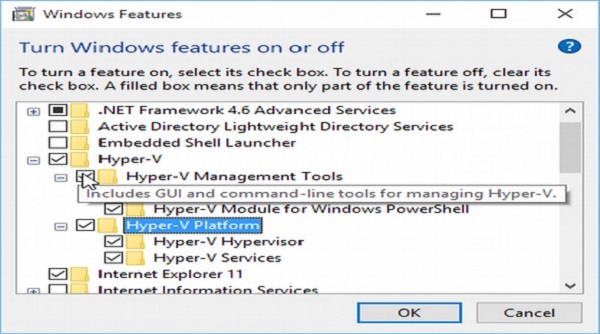
Step 4. After step 3, in the “Turn Windows features on or off”, look at the Hypervisor or Hyper-V feature and tick all the boxes.
Step 5. Windows will then install and configure Hyper-V, after that it will ask the user to restart and verify the changes made. It will go through a procession of restarts to finish the configuration of your system.

Developing a Virtual Machine by Using Hyper-V
After installing Hypervisor, the user can use it to create a Virtual Machine in your Windows 10 system. The steps to create a virtual machine by using Hyper-V are as follows:
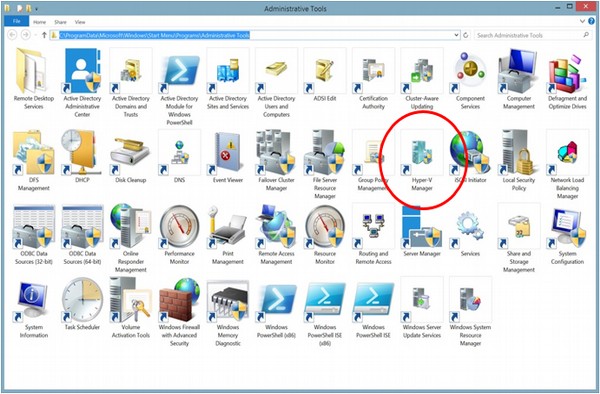
Step 1. Enter into the Control Panel by searching it on the search bar and select the Administrative Tools option.

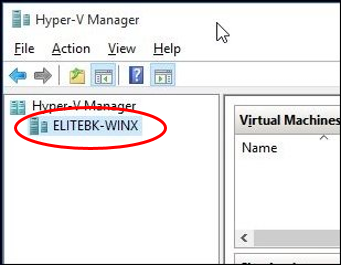
Step 2. In the Administrative Tools option, click on ” Hyper-V Manager”.
Step 3. You will then able to see your computer’s name, on the left side of the Hyper-V Manager. Select the name of the system to work on it.
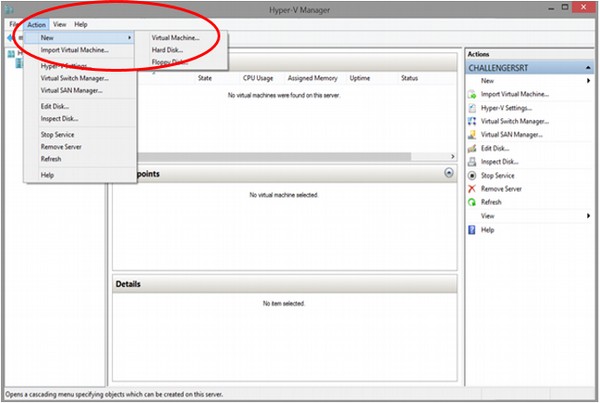
Step 4. After that, at the top of the screen, there will be an Action menu, click on it. Then select New and Virtual Machine.
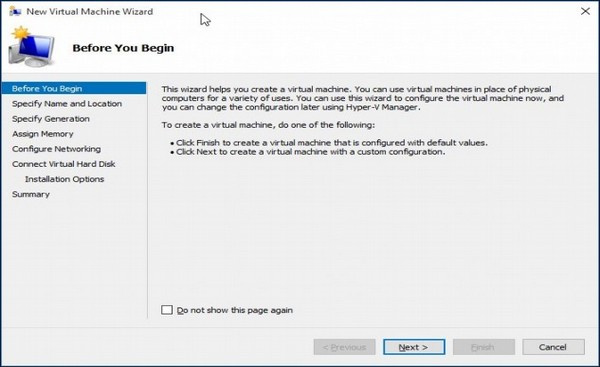
Step 5. To help in the virtual machine creating process, Hyper-V will open the New Virtual Machine Wizard. Here, to create a virtual machine with basic formats, the user can click on the Finish button. For advanced users, there is a different step, in which you can click Next, to go through the process of creating a customized virtual machine.
Step 6. After creating a virtual machine, the user will be able to see it inside the Hyper-V window.
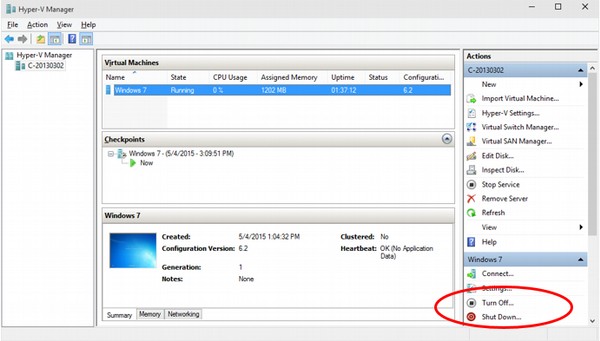
Virtual machines need to have an installed operating system in real and physical computers. The Hypervisor also allows the user to turn the virtual machine on or shut the virtual machine down by using the buttons on the right side. So, these are the steps or the whole process to allow virtualization on windows 10.