Data transfer between mobile to mobile is a piece of cake. But do you also think that when it comes to transferring files from your desktop or laptop to another is a tedious or difficult task? If so, then you’re wrong. In this article, we are going to discuss Microsoft’s Windows 10 Nearby Sharing with which you can transfer files from your desktop to another with ease. But before moving to the guide to setup and how to use Nearby Sharing, first we dive more into the topic and know more about Nearby Sharing.
Microsoft has brought Nearby Share to answer Apple’s AirDrop feature and was rolled out somewhat around mid of 2020 for Windows OS users via Google Chrome. With this feature, users can share files instantly and wirelessly between compatible devices. With Nearby Share, you can share photos, files, contacts, videos, links, and even tweets. This feature is useful and handy in those times when you need to urgently send or receive presentations, documents, photos, or videos to another person without using cloud services, email attachments, USB Flash drive, or any other medium.
Enable Nearby Sharing on Windows 10
After the April 2018 Windows 10 Update, if your device is Bluetooth enabled, then by default, Nearby Sharing should be enabled on every Windows 10. However, you can always ensure whether Nearby Share is enabled or disabled by using the settings app.
- Go To Settings.
- Tap on Systems.
- Then Tap on Shared Experience.
- Click on Toggle Switch to enable or disable the Nearby Sharing.
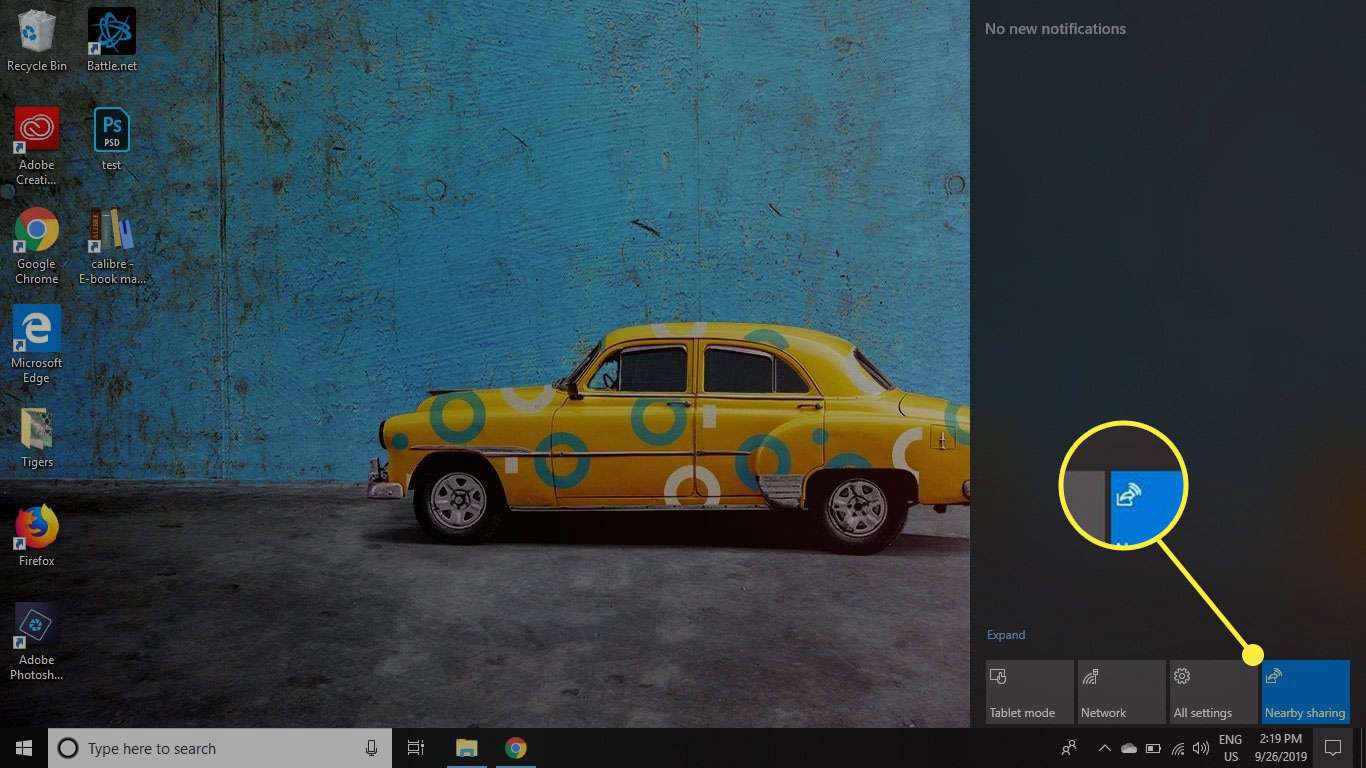
Alternatively, by using a shortcut Ctrl + A you can open your Action Centre and in the Action Centre, you can easily enable or disable the feature by clicking the quick button of Nearby Sharing.
And if the quick button for Nearby Sharing is not available then you can easily add it to the Action Centre below steps.

- Go to Setting.
- Navigate to System.
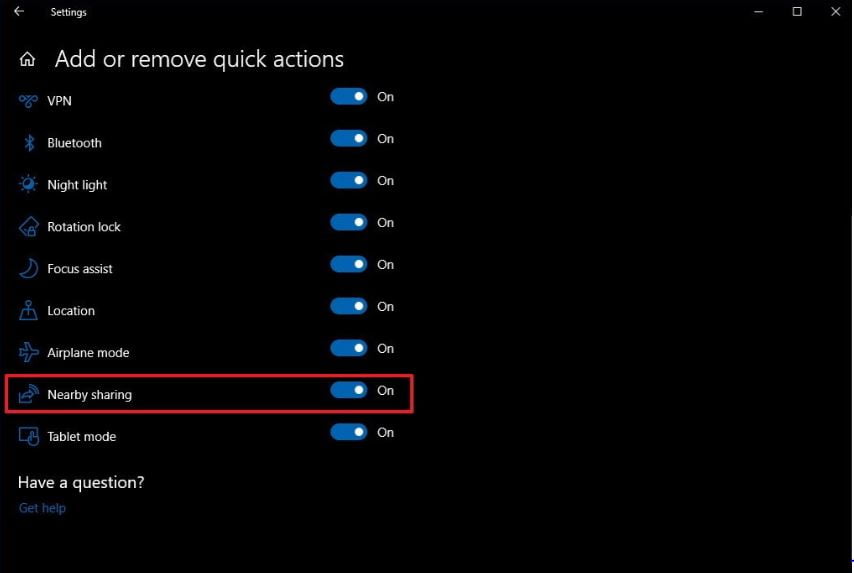
- Click on Notifications and Action
- You will get a list of Quick Actions, click on Nearby Sharing to add or remove from the Action Centre.
Modify Nearby sharing settings on Windows 10
Technically, Nearby Sharing is a simple and straightforward feature, but it allows you to customize a few settings as per individuals’ needs.
Specify How to Share or Receive Content
This feature allows you to decide or restrict how you share or receive content.
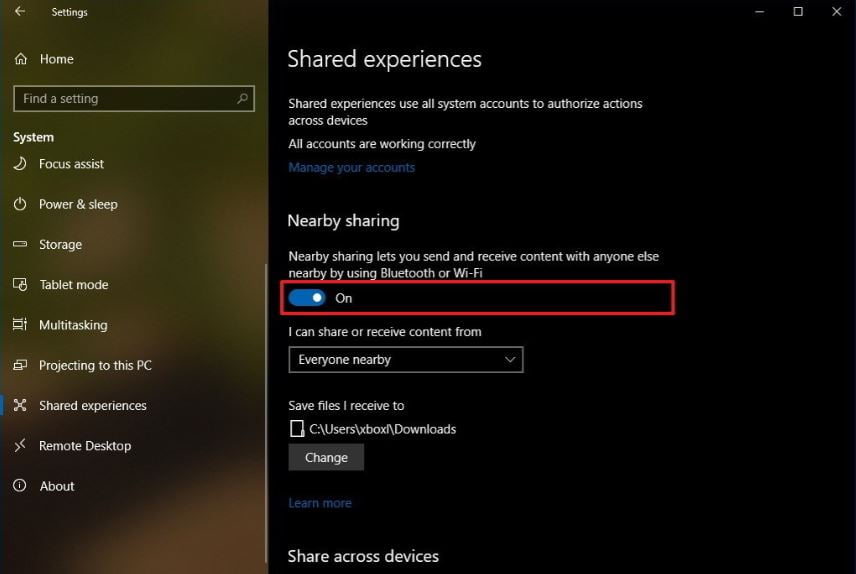
- Go to Settings.
- Navigate to System.
- On Left Panel Tap on Shared Experiences.
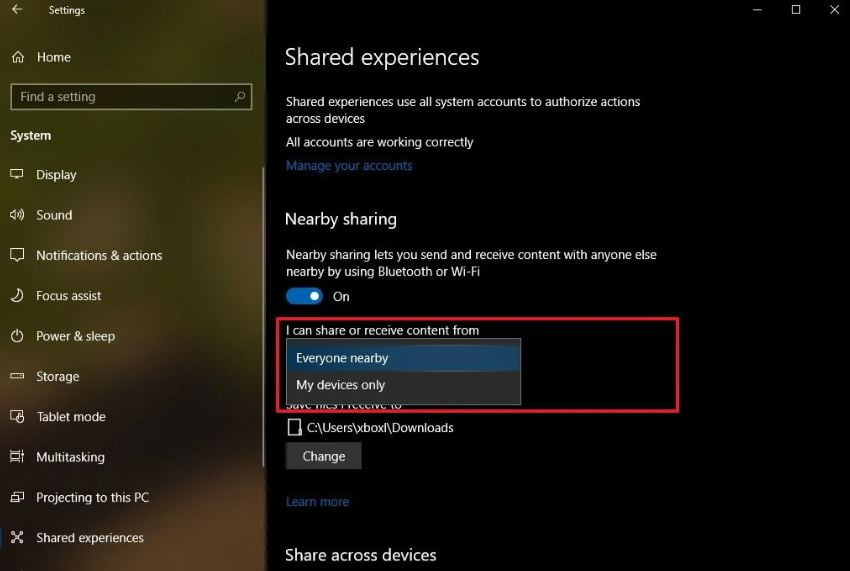
- Under Shared Experiences, on the left side you will get an option ” I can share or receive content from” from where you can select one of the two options.
Everyone nearby: By selecting this, your PC will be able to receive or send content from all devices that are nearby even those devices you do not own.
My devices only: With this option, your PC will only send or receive contents from those devices which are added to your Microsoft Account.
MUST-READ: When Will 5G Launch Date In India Out ? Know Here Everything
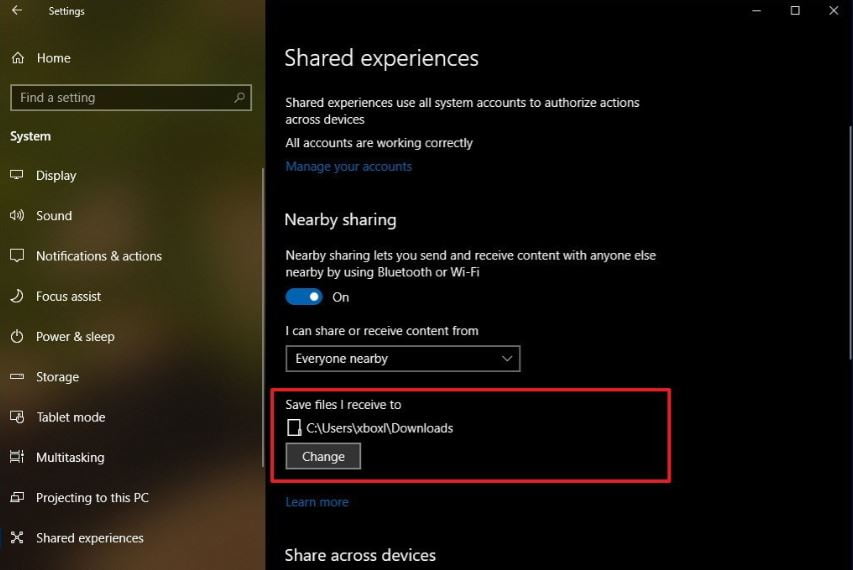
Changing Transfer Folder Location
The downloads folder is the folder where all transfer files will be stored by default. But as per your ease and convenience, you can specify any other drive or folder to store the transfer file.
- Go to Settings
- Navigate to System
- On Left Panel, Tap on Shared Experiences.
- Under Shared Experiences, on the left side you will get the option ” Save files I receive to”, Click on Change.
- Select Any Location as Per Your Need.
- Click the Select folder button.
READ MORE | How To Install Windows 10 From USB
Transfer files using Nearby sharing on Windows 10
Once you are all set with the settings and enabled the Nearby Sharing on your device, then it is really easy to share files with Nearby Sharing across different devices.
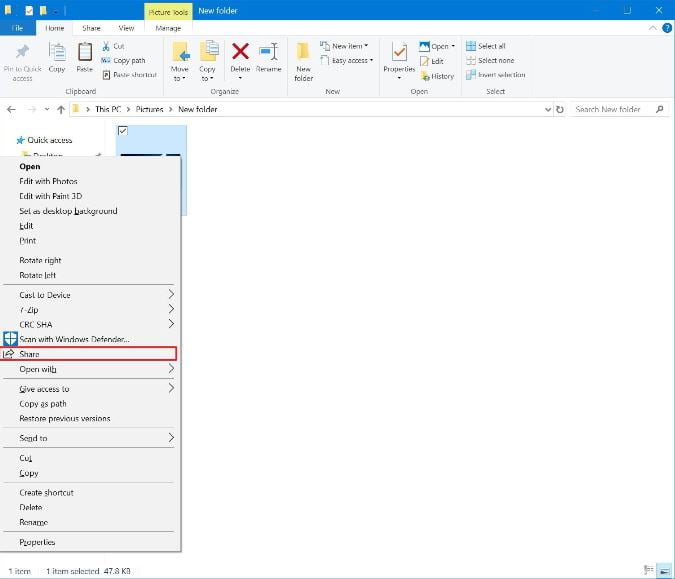
Steps to Share a File
To share any documents, pictures, videos, or any other files follow the below steps.
- Open the File Explorer
- Navigate to the File you want to Share in File Explorer.
- Right-click the file you want to Share.
- Tap on the ‘Share’ option.
5. Select the device from the list with which you want to share your files.
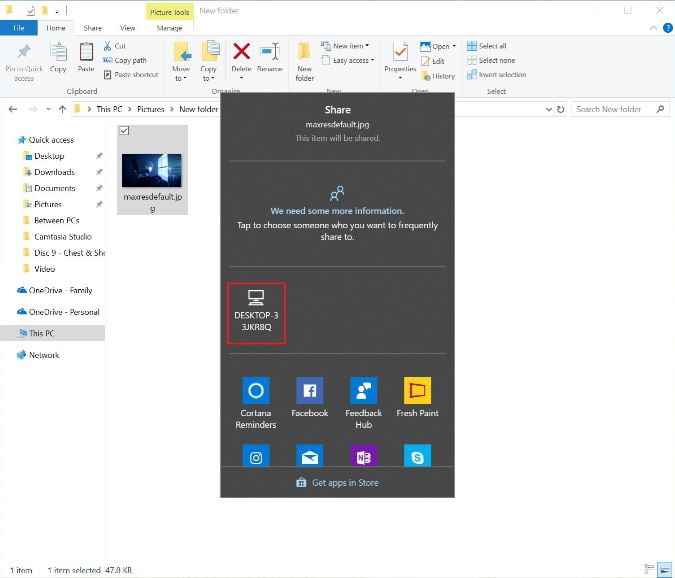
Now when you complete all the above steps, if the destination device is running on Windows 10 April 2018 Update and is within the Bluetooth range then the user of the destination device receives a notification to decline or accept the transfer. Also, the source device gets a pop-up with all the information of transfer. If the transfer is accepted from the other side then your transfer gets started otherwise if no response is made within a minute then the transfer gets terminated automatically.
How to Share a Web Link
To share web links between devices follow these steps.
- Start Microsoft Edge
- Visit the Web Page you want to Share
- On the top right corner tap on “Share”.
- Select the device from the list with which you want to share the Web Link.
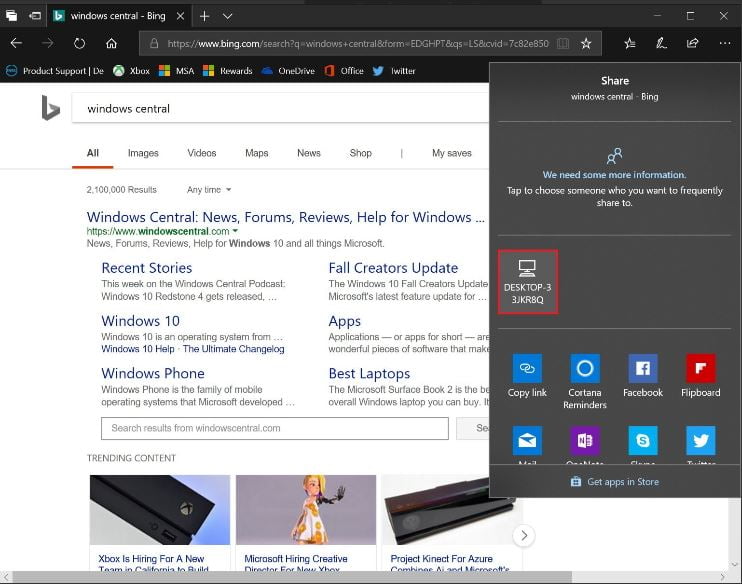
After this, the device on the other end will receive a notification to accept or decline the transfer. When the recipient accepts, the link will open in Microsoft Edge.
How to troubleshoot Nearby Sharing When Device is Not Connecting With Other Devices.
Overall, Nearby Sharing is a simple, straightforward, and easy-to-use feature and it works exceptionally well. But sometimes you will face some problems with connectivity between devices and you are unable to share your files or any other content. So, below you will get some troubleshooting steps to avoid these issues.
Bluetooth and its Connectivity
For Nearby Sharing both the device (i.e. source device and destination) but must be BlueTooth enabled as Bluetooth detects the nearby devices and transfers content. So always make sure that Bluetooth is enabled during the transfer.
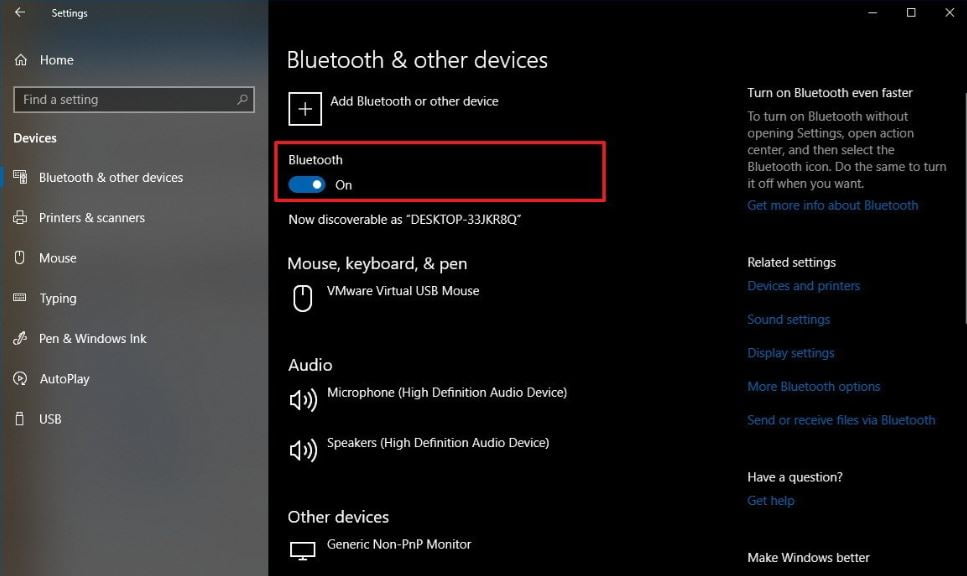
- Open Settings.
- Click on Devices.
- Click on Bluetooth & other devices.
- Turn on the Bluetooth toggle switch.
If Bluetooth is working fine and Nearby Sharing is still not working then please install the latest Bluetooth Drivers on your devices. Also, make sure that your Bluetooth adapter is not broken.
MUST-READ: Payments Gateway As An Alternatives Of PayPal
Bluetooth on Device Manager
- Open Start.
- Search for Device Manager, click the top result to open the experience.
- Expand Bluetooth.
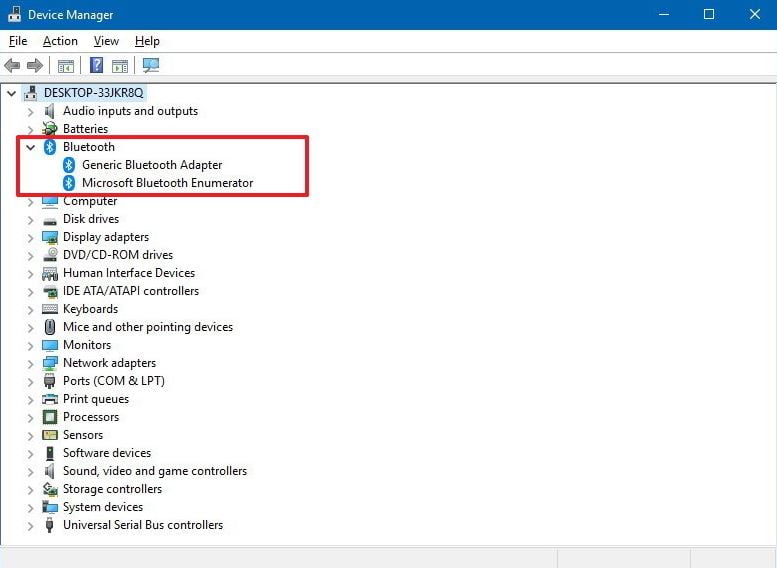
If there is a yellow icon with an exclamation mark on Bluetooth Icon, then there is some problem with your device.
If there is no Bluetooth Icon that means your device does not support Bluetooth or Bluetooth Drivers may not be installed on your device.
Bluetooth Compatibility
The Nearby Sharing feature is supported by Bluetooth v4.0 or above with LE support.
- Open Start.
- Search for Device Manager.
- Click the top result to open the experience.
- Expand Bluetooth.
- Right-click the adapter name, and select Properties.
- Click on the Details tab.
- Use the “Property” drop-down menu.
- Select Bluetooth radio option supports Low Energy Central Role.
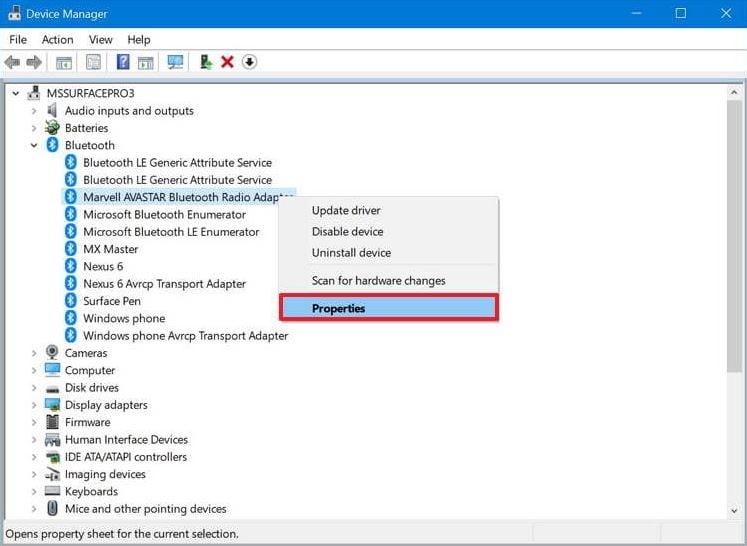
You can use Nearby Sharing if the value is set to “True”.
Moreover, if you are still unable to connect with other devices then move those devices closer to each other, as they may be out of range.
Winding Up
For Windows 10, Nearby Sharing is a great feature for seamless sharing of different content between two devices. But it is handy only if it is configured properly on both devices otherwise it becomes a headache. Also, keep in mind that, Nearby Sharing works with both WiFi and Bluetooth. Only share small files and content while using it on Bluetooth otherwise, the transfer will be slow and painful.
Do not forget to tell us in the comment section below about what features or method do you use in your day to day life to transfer file between your desktops and laptops.
READ MORE | Is Windows 11 Release Date Coming This Year? Know Here